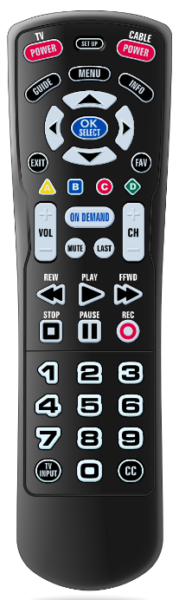
fbpx

Call Features

Call Waiting
If you’re on the phone and someone is trying to reach you, a “beep” tone tells you that a call is waiting.

Quickly press receiver button or flash key once and release it.
This puts the first call on hold and connects you to the second call.

To return to the first call, press receiver button or flash key once and release it.
You will connect with the first caller.

NOTE: You can switch between calls as often as you want by repeating
the steps above.

Cancel Call Waiting
Allows the customer to cancel call waiting for one call by dialing two digits. To deactivate this feature, just pick up the phone and touch *70. You will hear 3 beeps. Do not hang up. Dial the number you want to call. Call Waiting is automatically restored when you hang up. This service is provided free in conjunction with Call Waiting.

Caller ID
This service provides the name and number of the party calling you.

Caller Waiting ID
This service requires you to have subscribed to both Caller ID and Call Waiting. With Call Waiting ID, you can see who is calling you when you are on the phone with someone else. While you are on the phone, you will hear your call waiting tone to notify you that a second call is coming in. Within a few seconds after hearing the tone your Caller ID display (if your phone has capability) will show you who is calling on the second call.

Call Forwarding
Call Forwarding lets you transfer your incoming calls to another number. It’s great for the business person who wants to catch after-hours calls at home, or for anyone who doesn’t want to miss an important call.

*72
To activate, pick up the phone and touch *72. Dial the number where you want your calls to be forwarded. You know your Call Forwarding feature is in effect when someone answers at the forwarding number. If there is no answer at the forwarding number, or if the line is busy, hang up and repeat the steps above. If you do so within two minutes, you’ll hear two beeps meaning your Call Forwarding is now working.

*73
To deactivate call forwarding, pick up the phone and touch *73 and wait four seconds. Listen for two beeps. The Call Forwarding feature is no longer in effect, and calls will ring on your phone.

Call Forwarding – Don’t Answer
Redirects your telephone calls to another telephone number if you do not answer your telephone call within a pre-specified number of seconds (default is 20 seconds). The number of telephone seconds before your call is forwarded is determined by you, the subscriber, but set by the telephone company.
*92 – to activate
*93– to deactivate

Find Me
Allows an incoming call to one phone number to ring up to 6 other phones at the same time. Make it easy for friends, family or customers to find you without having to try a list of phone numbers.

Three Way Calling
Dial the first party and put the first call on hold by pressing the Flash button or quickly press the switch hook on your phone. After you hear a second dial tone, dial the telephone number of the second person. Press the Flash button or switch hook again, and all 3 parties will be connected on your call.

Troubleshooting

DCTV Troubleshooting:

What’s wrong with my TV?!  If you are experiencing any of the following issues you may need to reboot your set-top box:

– Picture is frozen

– Guide does not appear

– Channel Temporarily Unavailable appears on the screen

– The time on the interactive program guide is incorrect or doesn’t display the correct information

– Your TV is tiling

How do I reboot?

1.  Unplug the power cord from the wall outlet or back of the box.
2.  Wait 10-15 seconds and plug power cord back in.
3.  The set-top box will cycle through a loading process. This may take a few minutes.

Right there towards the bottom!  Not the one that looks like a phone jack…that’s CAT5, silly!

If this doesn’t do the trick, or if you are having trouble with all TVs in your home, you may also need to reset your Ethernet switch as well (either D-Link or Linksys brand.)  Same process, just a different piece of gear.  Looks boring like this one to the right, but will have flashing lights.

Still not working?!  Oh shoot.  We apologize profusely for the inconvenience.  Please give our friendly, knowledgeable, and attractive Customer Service Representatives a jingle and they will bend over backwards to make sure you’re back to watching Duck Dynasty before you can say Duck Commander.

FYI, if you are going to be away for a period of time, please leave your set-top box plugged in so it can receive all of the software upgrades it needs to work properly for you when you return!

Restart TV

Running a little late and missed the beginning of your show? Restart it!

  • Restart Channels are indicated by the green Restart icon next to the channel in the on-screen Program Guide
  • Highlight the program and press the GREEN button on your remote to Restart and watch from the beginning.
  • The Restart icon can be found in the program guide as well as the What’s Hot app and the Browser Bar.

Easy-peasy!


Restart TV available to all TV customers with an HD capable box.

Program My Remote

Amino 140/540 RemoteBack Lit remote

View printable instructions

Auto Program (Search for a code)

1. Turn the TV on.
2. Press TV, it will blink once.
3. Press and hold SETUP, the TV key will blink twice.
4. Press 9-9-1, the TV key will blink once.
5. Press and release the CH+ key continuously, then stop when the TV turns off.
6. Press SETUP to save code.

Easy/Polaris Remote

*To find your TV code, click here.
To search for a code automatically:

Easy Remote

1. Make sure the TV is turned ON.
2. Press the TV power key.
3.  Press and hold SETUP until the TV power key blinks twice, then release.
4.  Enter 9-9-1 on the number keys.
5.  Press CH+ key repeatedly until the TV turns OFF.
6.  Press SETUP to save the code.

Big Button Royal RemoteBig Button Royal Remote

Power/Setup Keys
*TV POWER turns your TV on and off
*CABLE POWER turns your set-top-box on and off
*SETUP used for remote control programming

Programming the Remote to the TV – Code Search Method
1.  Press and hold SETUP until LED blinks twice.
2.  Press the TV POWER key.
3.  Press and hold down the OK/SELECT key.
4.  Let go of the OK/SELECT key when the TV turns off.

Programming the Remote by Popular Brands of TV
1.  Press and hold SETUP until LED blinks twice.
2.  Press the TV POWER key.
3.  Press and hold down the DIGIT key (1-0) for your TV brand.
4.  Let go of the key when your TV turns off. Setup is complete.

Number        TV
1                     Insignia/Dynex
2                     LG/Zenith
3                     Mitsubishi
4                     Panasonic
5                     Philips/Magnavox
6                     Samsung
7                     Sharp
8                     Sony
9                     Toshiba
0                     Vizio

Inputs

With your new, fancy HDTV, there are a zillion settings that can be adjusted to best enhance your viewing experience.  If your TV doesn’t have the best quality picture, or if you’ve somehow changed your TV to the incorrect input, we can help!

Here’s a quick tutorial to help simplify your inputs and aspect ratios:

Inputs:

HDMI

Flat and thin; keyed with notches to indicate which way is up. HDMI is the most common, highest quality, and easiest way to connect components to your TV. This digital connection ensures zero data loss or distortion and is widely supported across a wide range of consumer electronics. It also delivers audio along with the video, all via a single cable.

Component
A set of five round ports—three for video, two for audio. Component connections offer the highest-quality analog connection available (and it’s the only way to get HD over an analog connector). Component is a good choice if HDMI is not available, but because component requires five cables, some devices don’t support it.

Composite
A set of three round ports—one for video, two for audio. Also called RCA connectors, composite is the lowest-quality analog connection (and it can only handle standard-definition video), but is ubiquitous on virtually every consumer electronics device. Use only if using a low-resolution source such as a VHS player.

Coaxial Input
A round, threaded socket. Used to connect your TV to a standard cable input or an antenna source.

Your TV is equipped with many different inputs to connect all of your devices.  Whether it’s your DVD player, a gaming system, a Roku box, or your DCTV set-top box, each device has an input assigned to tell the TV which device you want to control.  The cable you use to hook up your set-top box will determine which input you need to access your DCTV programming, ie. HDMI 1.

Clear as mud right?

Moving on to Aspect Ratio:
There are two common TV screen shapes that most folks will recognize — the squarish shape of conventional TVs, and the widescreen shape of today’s HDTVs. The term used to describe TV screen shape is “aspect ratio” — conventional TVs, and some small LCD HDTVs, have a 4:3 aspect ratio; widescreen HDTVs have a 16:9 ratio.

TV shows also typically have a 4:3 or 16:9 ratio. While most new HD programming is in 16:9, a significant amount of TV broadcasts are still sent in the conventional 4:3 ratio. And it’s the difference in shape between those two ratios that can result in a “pillar boxed” picture — one with black columns standing to the left and right of the image — when you watch a conventional 4:3 program on your widescreen TV.

What can I do about the “black bars”?
You may choose to keep the black bars on 4:3 sources, or decide to stretch or zoom that picture to fill the whole screen — it’s a matter of personal preference. Nearly all recent widescreen TVs include one or more viewing modes that fill out the screen’s width by stretching and zooming the image. While most people find this effect acceptable for non-critical “background” viewing like the local news, many aren’t thrilled when their favorite actors suddenly look noticeably stockier.

To stretch or zoom the screen press the * button on your remote.  Simply press the star button again to go back to the original setting.

How do I change my aspect ratio and input settings?
Press MENU on your remote
Arrow down to SETTINGS
Arrow over to the right and highlight DISPLAY and press OK
Your Display Settings will appear on the screen
Use your arrow buttons to change the following display options
1. Turn Closed Captioning On or Off.
2. Set the Audio Language to English or Spanish.
3. Set the TV Type or Aspect Ratio to either 16:9 or 4:3.
4. Change your Connector settings to Coaxial, Composite, S-Video, Component or HDMI.
5. View the setting for Conversion Mode, Original Size or Fit to Screen (this may also be changed temporarily by pressing the * button on the remote control).
6. Select the Output Resolution for the television.
If you feel you have changed something by accident, select Exit and press the OK button or just press the EXIT button on the remote to retain the original settings.

Can I schedule my TV recordings online?

Set up/edit your series recordings, see “What’s Hot” for popular channels and TV shows, or view program guide information right from your mobile devices.  Mobile app available for Apple and Android devices.  Don’t worry, be appy!

Click here for the IPTV Web-Portal
Your username will be your 10-digit phone number
Default password is 0000 until you choose to change it

For Apple Users:
1. Go to your app store and search “MyTVs
2. The URL is: 66.163.159.236

  • Username: your agreement number (for example, your 10 digit phone number: 7019521000)
  • Default password is 0000 until you choose to change it

For Android Users:
1. Go to your Google play store and search “MyTVs
2. Enter your Username: your agreement number (ex:7019521000) and default password 0000

DVR Instructions

Record a show and watch it later…that’s the beauty of DVR!

To record programming:
•Press GUIDE on your remote. Highlight the programming you would like to record and press the red record button on your remote. A small red dot will appear on that programming timeframe.
•You can also record programming by using the SEARCH option in your MENU or by pressing the red record button on your remote during any live programming.

To record a series:
•Choose program from guide and press OK.
•Select Record Series
•Select Edit Recording. This menu will allow you to customize your series recording. If you would like only new episodes to record, arrow over to RECORD WHICH EPISODES & select > to change your options to NEW ONLY. If you would like all episodes to record, leave the option as ALL EPISODES
•Your series recording can be customized by changing the options listed on this screen. To save your settings select OK.
•Press your exit button to return to regular programming

To view recorded programming:
•Press MENU on your remote. Select RECORDINGS, then choose from current, future, or series. A list of  programs will appear.
•Select the recording you would like to view or edit and press the PLAY button or OK on your remote to edit the recording.

To schedule a recording online, log in to My DCTV.

Troubleshooting an In-Home WiFi Network

Are you having trouble connecting to the Internet through a network in your home? Try these tips to troubleshoot Internet connection problems on a wireless or wired home network.

1. Check your network connections and make sure your cable connections are set up correctly.

  • Wired connections to the router: If you are connecting through a wired network, make sure the computer connects into the router. The computer’s Ethernet port should connect to one of the numbered ports on the router (1, 2, 3, or 4). Use a standard Ethernet cable (straight-through not crossover cable).
  • Wireless connections to the router: If you are connecting through a built-in wireless adapter, verify that it is on and enabled. If you are connecting through a wireless network, make sure the Wireless USB adapter is not loose where it connects into your computer. Additionally, you need to install the adapter’s software (drivers) before using it.

2. Restart your equipment in the following order:

  • Unplug the power to your modem or switch (if you have one) for 30 seconds and wait another 30 seconds before continuing to the next step.
  • Unplug the power to your router for 30 seconds and wait another 30 seconds before continuing to the next step.
  • Restart your computer.

After restarting equipment, check for an Internet Connection. If you are still unable to access the Internet, please call the helpdesk for further troubleshooting.

Setup Email on my Smartphone or Other Device

We know how important it is to have access to your email at all times! However, there are a few things to consider when setting up an email account on smart phones or other mobile devices:

1. How would you like to manage your account and where would you like to store your messages?
2. Storage limits, 100 Mb for a standard DCT email account.
3. How many devices will you be checking your email on.

To set up email on Apple Devices:
From the iPhone or iPad home screen, tap Settings
Tap Mail, Contacts, Calendars, then Add Account.
Tap Other.
Tap Add Mail Account.
Enter Name, Daktel.com email address, Password, and Description, then tap Next or Save.
Tap POP or IMAP.
Under Incoming Mail Server, enter the incoming mail server settings, user name, and password.
Host Name- mail.daktel.com
Username- your full email address (ex. helpdesk@daktel.com)
Password- your Daktel.com email password
Under Outgoing Mail Server, enter the outgoing mail server settings, user name and password.
Host Name- smtp.daktel.com
Username- your full email address (ex. helpdesk@daktel.com)
Password- your Daktel.com email password
Tap Save.

For email on other Smartphones and devices:
The email application on your smartphone will need the following settings to be set up correctly:
* Your email address and password
* Your Username is your full email address (i.e. helpdesk@daktel.com)
* Incoming email server: mail.daktel.com
* Outgoing email server: smtp.daktel.com
* Authentication is required for the outgoing mail server.

Types of Setup:
IMAP
IMAP Configuration is preferred when multiple devices are used to access the same email account because messages remain on the server until deleted or moved to a local folder. If you set up your smartphone using IMAP, be sure that all other devices are also configured for IMAP to avoid any unwanted email experiences.

POP3
Although not recommended for smartphones, POP3 configuration may be used when a single device is used to access the email account because messages are downloaded from the server and will stay on the device until deleted. No other device or computer will be able to view or download messages from an account that has been configured as a POP3. Be sure you have sufficient storage on your phone or device for the messages you will be storing.

Please remember when you set frequency to fetch new data, that the more often you check, the more battery you’ll consume. For assistance in setting up your email accounts, please call 1.800.771.0974 and ask for the Helpdesk!